If the user experience of these things were supposed to VGA with a capacity of 128mb to 256mb should be updated VGA driver or update it with a VGA which has a capacity of at least a decent enough example of 512mb, but if so we could use alternative android emulator such as using android sdk and can be installed in various windows like windows xp, windows 7 and windows 8, android sdk installed in ubuntu was running well.
Android sdk emulator is that we can use on your computer or laptop so if we do not have a android phone and just want to know how the operating system works, and it allows us to use a variety of applications in the android emulator on PC such as WeChat, WhatsApp, KakaoTalk , line, games and so forth.
I use the android sdk emulator in Windows 8 with a dual core Pentium PC, VGA 256 mb, 1 gb ram initially but android sdk liked it a little tough but after the upgrade it so 2 gb ram android sdk on my computer was so smoothly although there is little sometimes a little slow.
The following steps should be done before installing the android sdk emulator on a PC, laptop or computer.
1. For those that do not have java on his computer first download and install the java here.
2. Download Android SDK emulator here, select the bottom of the SDK is to post only tool and then select the Windows 32 & 64-bit -> installer_r22.0.1-windows.exe.
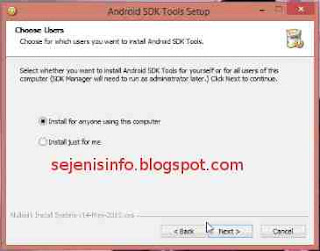
3. Once Java is installed and the android sdk tools have downloaded android sdk install it and follow the steps it according to the instructions given, but at the moment there are options such as install just for me and install it for anyone that's up to you but I choose the install for anyone look at the picture below.
4.After android sdk tools already installed, its folder in program files/android, android so be easy to find or on the run will then open the Program Files folder -> android -> android-sdk and there will be a file called SDK Manager, right click on the mouse and Send to a desktop, this is to add a shortcut icon to your desktop.
5. Open SDK Manager icon on desktop and later there will be option to choose android which will be installed and will be used as an android, there is android 2.1, 2.3 (ginger breed), 3.0 (Honeycomb), 4.0 (ICS), 4.2 (Jellybean). Want all the install also does not matter as long as a lot of Internet quota :).
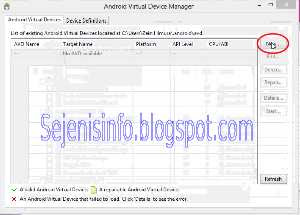
6. Once downloaded and installed android, then open the tool and click on the Manage AVDS tab at the top the android sdk to start using android emulator.
7. Then click the New button on the right android avd tool.
8. Fill as needed as described below:
- AVD name = fill free, but don't use space
- Device is to choose the android that we will use later with a screen size of Android
- Target is installed in the android sdk tool.
- CPU / ABI = usually wear arm
- keyboard and tick skin only
- Front camera and back camera may be used to select one of the main course options or choose not to use none.
- Memory Options for the Ram = 1 GB ram computer use Ram = 512 and for use 2GB Ram ram = 1024.
- Internal Storage 200 free = example only.
- SD Card = 1024
- Last click OK.
9. After all filled and click OK then in AVD or Android Virtual Device Manager will be the name of the android system we have created. To do this we can directly click start on the right, to make a new android emulator and click New to Change we can click on the Edit button. To start using the Android SDK on Windows click on the name of android that had been made and start clicking on the right and click on launch window.
10. Then a new window will pop up was the android sdk. To make the android sdk so that its display to portrait or landscape or rotate or rotated into elongated click the button number 7 or 9 on the right keyboard and of the numlock.


No comments:
Post a Comment